RStudio Basics
- Getting set up
- Navigating RStudio
- Turn off autocomplete
- Uploading files to RStudio
- Downloading files from RStudio
Getting set up
-
Go to https://posit.co/products/cloud/cloud and sign up for a “Cloud Free” account.
-
Log in and click
Your Workspaceon the left. Click onNew Project->New RStudio Project. -
Name the project whatever you want. Suggestion: “Econ 433 <Your Last Name>”.
You should only have to create one project for this class. You’ll keep all the files associated with this class within that single project.
Navigating RStudio
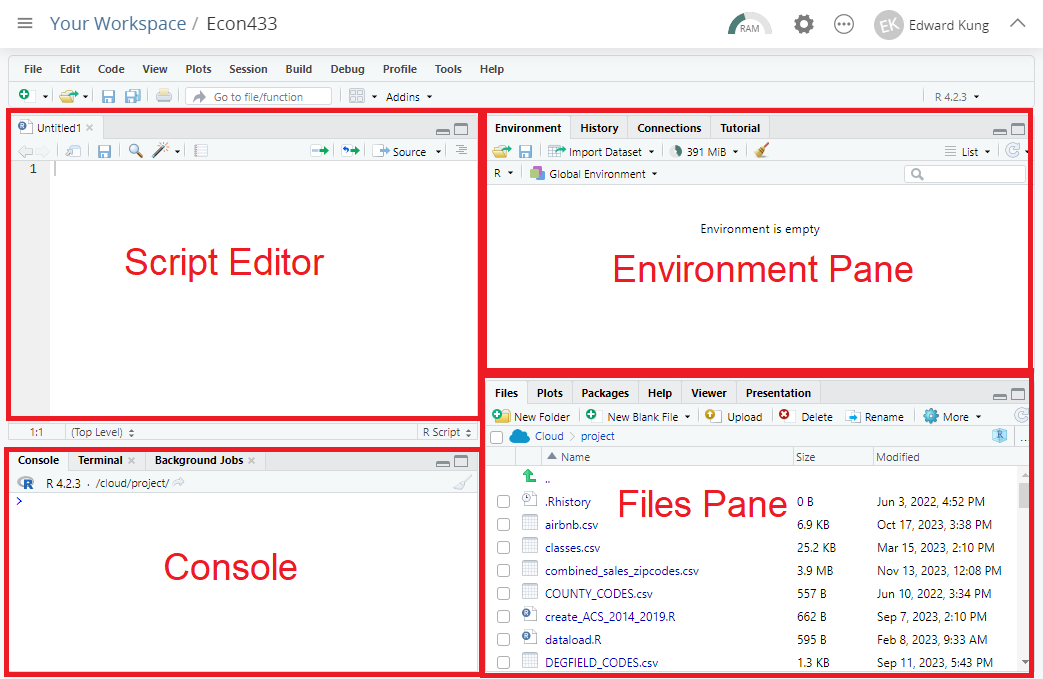
By default, your RStudio Cloud is organized into four panes:

- The upper left pane is the script editor. This is where you will write and execute your scripts.
- The lower left pane is the console. This is where you can type commands directly to R without using a script. It’s also where the output of your commands shows up.
- The upper right pane contains a number of tabs, but we’ll only be using the Environment tab. This tab shows all the objects loaded into R’s work environment.
- The lower right pane also contains a number of tabs. In this class, we’ll only use the Files tab and the Plots tab.
- The Files tab shows all the files that you’ve uploaded or created in your project.
- The Plots tab is where the charts you create will show up.
“Environment” and “Files” are not the same. Files are persistent but objects in the work environment are temporary. Think of the Files tab as your filing cabinet and the Environment tab as your desk.
The typical workflow in R is to first clear your desk, then make copies of the items you need from the filing cabinet, then put the copies onto your desk. You can then manipulate the items on your desk without changing what’s in the filing cabinet.
Turn off autocomplete
If you are a beginner at R, I strongly suggest that you turn off auto-complete. Most of the time, it will only confuse you and get in your way.
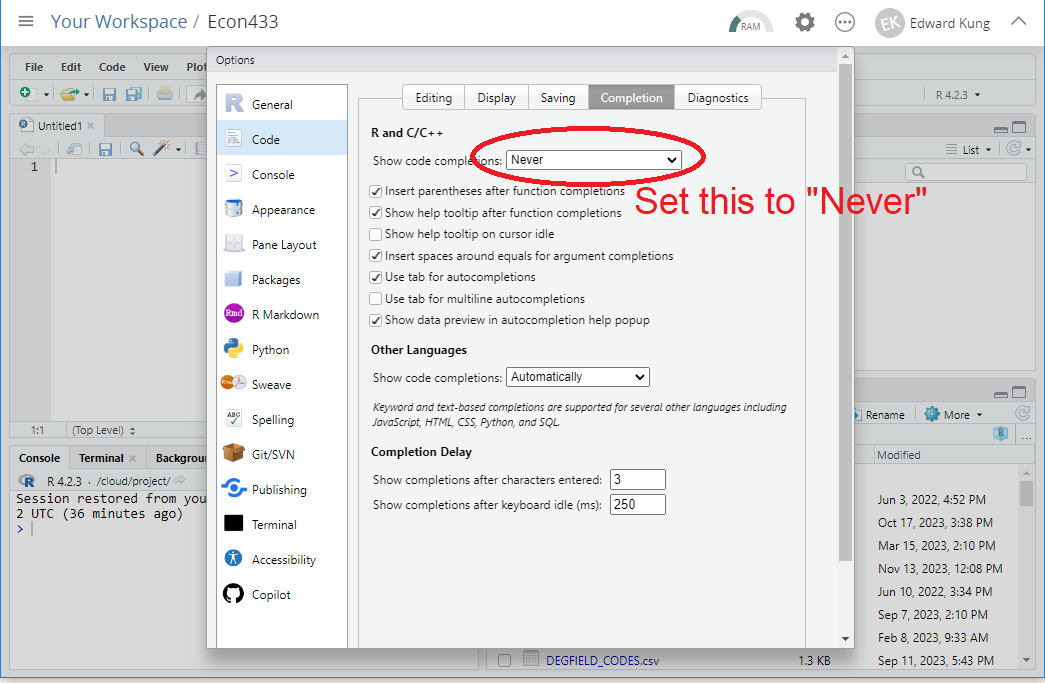
- Click on
Tools->Global Options. - A settings menu will open. Click
Codeon the left sidebar. Then click theCompletiontab. - Set
Show code completionsto “Never”, as shown in the image below. - Click OK to accept these changes.

Uploading files to RStudio
To upload a file from your computer to RStudio, click the Upload button on the files pane. This is how you’ll get data files from your computer onto your RStudio Cloud project.
Downloading files from RStudio
You’ll often have to download a R script that you wrote on RStudio Cloud to your computer, so that you can then upload it to Canvas for grading.
To download a file from RStudio to your computer:
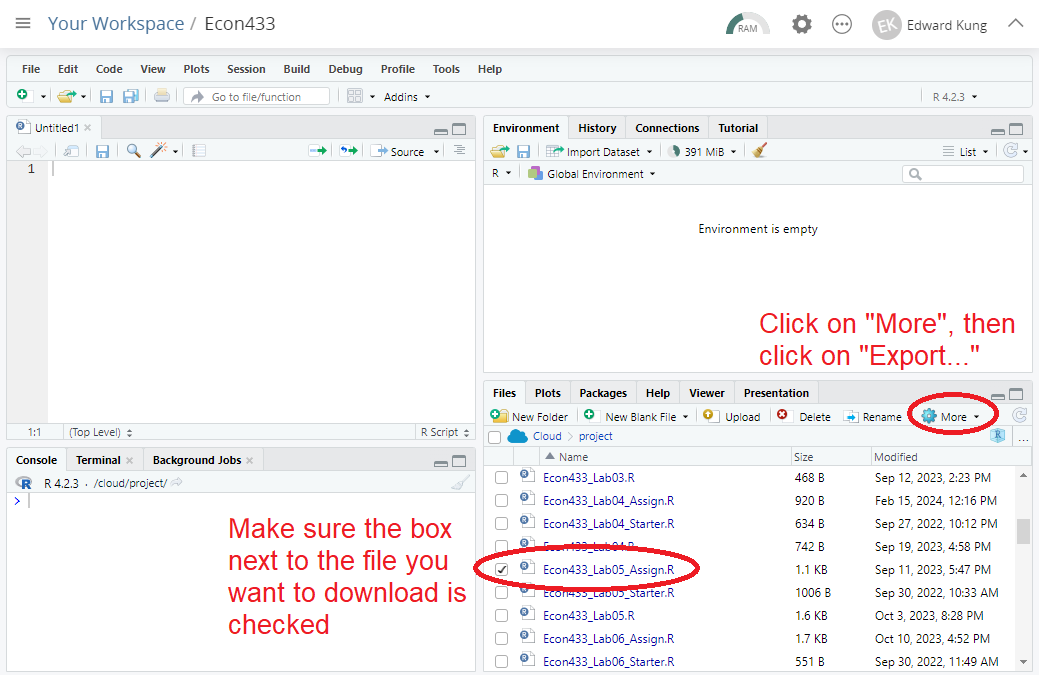
- On the Files pane, check the box next to the file you want to download.
- Click
More->Export. - In the pop-up window, name the file something descriptive. Then click
Download.
See the image below for more guidance.
